CurseForge
Installing MineColonies Mod through CurseForge
- This process will cover both how to install just MineColonies, but also one of our modpacks.
- No other installation requirements are required, besides installing CurseForge itself.
Note: We cannot offer support on problems with CurseForge directly.
Step 1: Downloading CurseForge
You can download CurseForge here, choose whether you want the overwolf or the standalone version. We recommend picking the standalone version, as generally this is the only Overwolf application people would use.
If you already have Overwolf installed, open Overwolf on your computer and install the CurseForge app through there.
Step 2: Opening CurseForge & Installing Minecraft
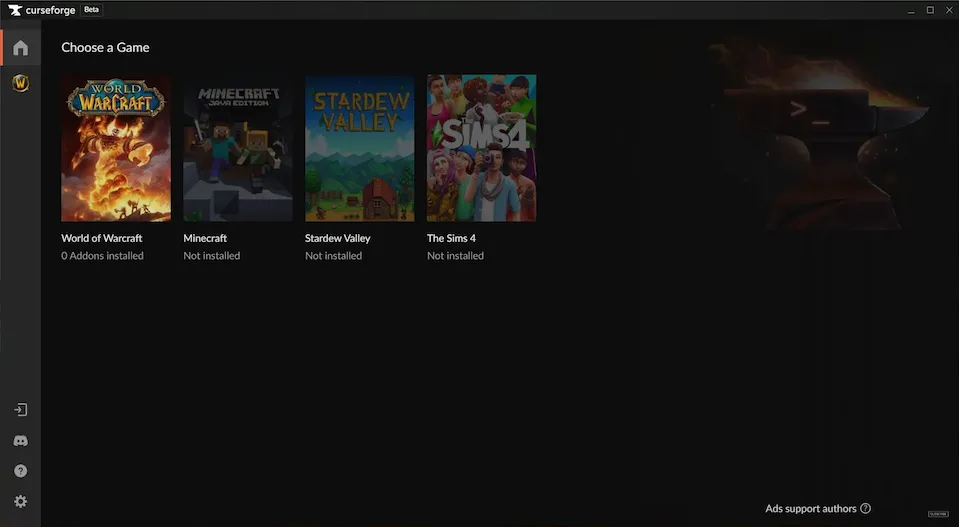
When you initially open CurseForge, you can see a list of games on your left, initially there should be nothing here.
Select the "Home" page on the bar on the left, find "Minecraft". The exact list of games you see in the image below will probably differentiate from what you see.
Next, you will be prompted to install Minecraft, pick the standard installation option, this is a quick installation in the default installation folder for Curse. You may choose advanced if you wish to change specific things for your installation of Minecraft.
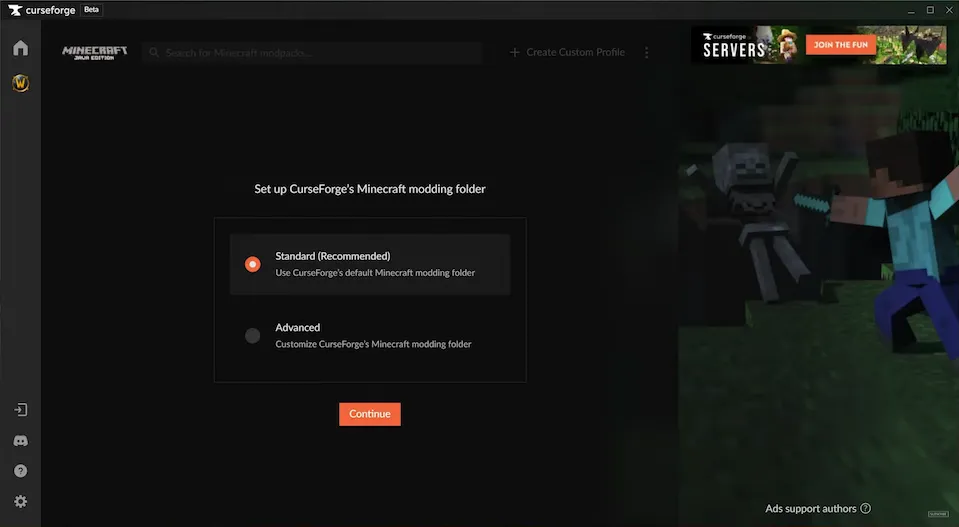
The installation shouldn't take very long, once done you will be sent to the home page of your Minecraft installation, where you can manage your modpacks.
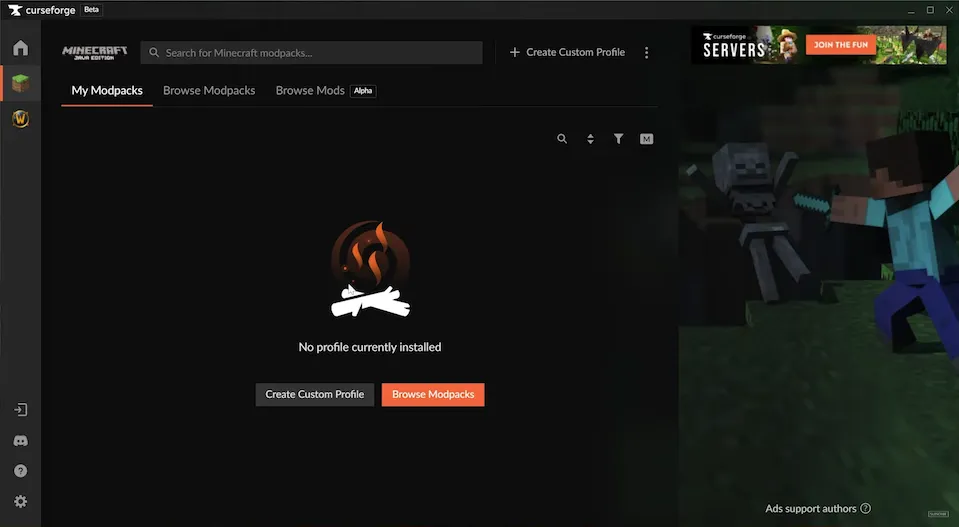
Step 3: Choose whether you want to play an existing modpack, or make your own
You can choose whether you want to use a pre-made modpack, or create your own modpack with just the mods you want.
If you want to use a pre-made modpack, click on "Browse" on the tabs at the top of the screen, and search for "MineColonies Official", created by Raycoms. From here you can install the pack, CurseForge will download all the mods, once it's done you can click "Play" and start having fun, it's that simple.
If you want to make your own pack, and manage the mods yourself, please continue to step 4.
Step 4: Creating your own modpack
Creating your own modpack is not that difficult, click on "Create" at the top, name the profile whatever you like. The important parts lie in the options below, note that the most of these options may not be changed anymore after creating the pack. So make sure you choose correctly.
First have to select the Minecraft version you want to play in, choose whatever you want.
Note: Please set the version dropdown in the top right on this page to the same version, so you get the most correct instructions for that specific version.
For the game type, select NeoForge, any other modloader won't work.
The modloader version, you may ignore, just pick what it tells you to. (Usually the latest version of NeoForge), this is the only option you can change after creating the profile.
For the game type, select Forge, any other modloader won't work.
The modloader version, you may ignore, just pick what it tells you to. (Usually the latest version of Forge), this is the only option you can change after creating the profile.
Note: For 1.20.1, we recommend using Forge version 47.1.3, any version above this is unstable.
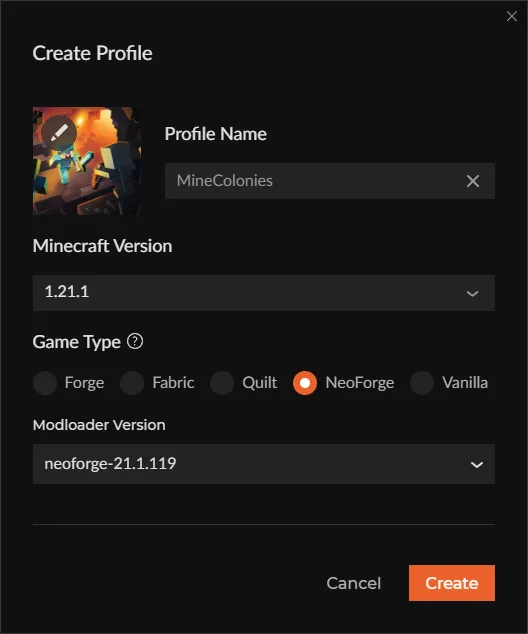
Once you are happy with your settings, click on "Create" to finish the modpack creation.
CurseForge will now create the modpack and start downloading the files from Minecraft to start the creation of your instance, this will take a little bit of time to finish. You may already continue to step 5 whilst this process is busy.
Step 5: Adding MineColonies and dependencies
In order to add mods to your modpack, click on the modpack (if you come from step 4 you should already be here) and click on "Add More Content". This will bring you to the screen to search for mods.
Look for "MineColonies", and click on "Install". CurseForge will automatically add MineColonies and it's dependencies to the mods list. Feel free to add anything else you like to the pack, note that we cannot give support for custom made packs including anything else besides our own mods!
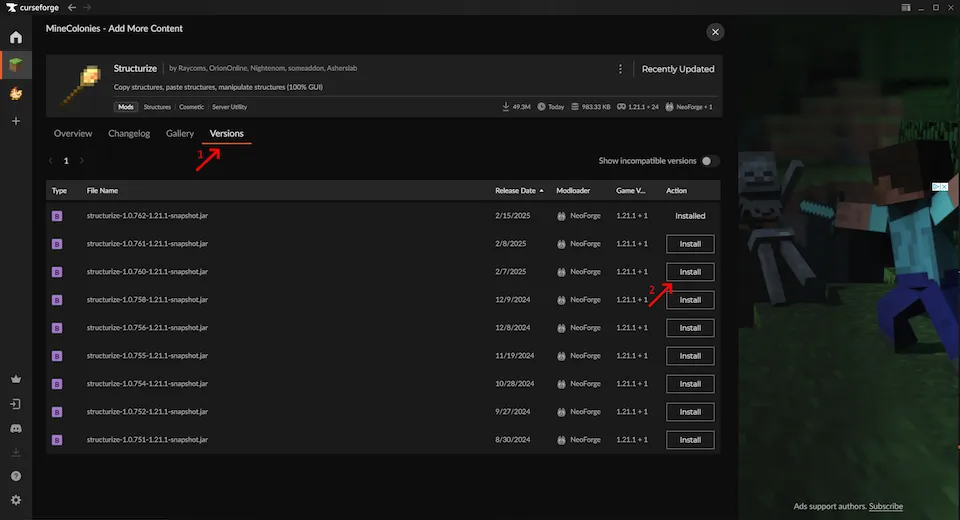
Note: CurseForge makes a best attempt at installing the correct dependency versions, but may not always go correctly. If during startup your game tells you that you have the wrong versions of certain mods, find the faulty mods in CurseForge, click on the name of the mod. This will bring you to the detail page of the mod in question. On the tabs you can click on "Versions" and from here you can install a specific version of a certain mod.
Step 6: Start Minecraft
In the top right, click the "Play" button, this will start the regular Minecraft launcher. Login to your Microsoft account if you aren't logged in, and start the game.
Step 7: Troubleshooting
If your game does not start up correctly, you are getting some error on startup and unsure of what to do, join our Discord server and ask in our help channels what is wrong!
If changes are needed or you think there is content missing, feel free to edit this page or submit an issue for us to make edits. - MineColonies Wiki Team